@Jetson YOLO: Ubuntu Desktop and JetPack
This chapter is about verifying the machine before doing anything more ambitious. On Jetson, the exact JetPack and library stack matters enough that version drift can waste hours later.
Linux Command Line
If you are still new to Ubuntu CLI usage, start with Basic Commands. You do not need to be a shell expert, but you do need to be comfortable moving around the filesystem and installing packages from the terminal.
Check the Desktop Environment
If you see the NVIDIA-styled Jetson desktop, that is a quick sign that the system is at least booting into the expected Linux environment.
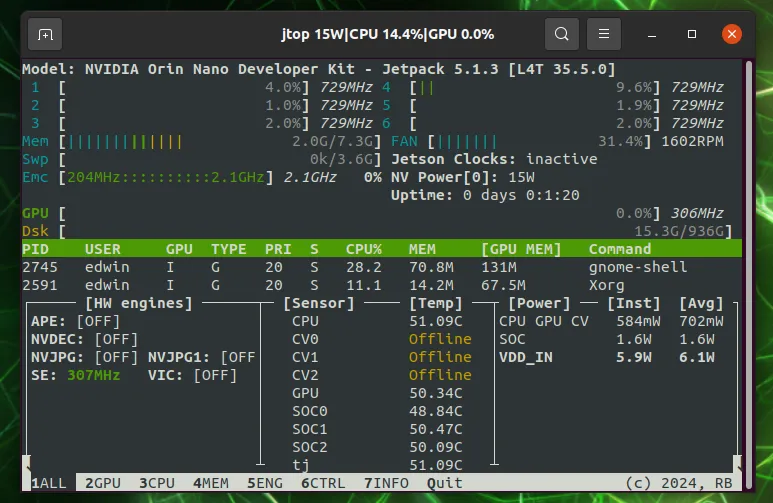
Install jtop
One of the first tools worth installing is jtop from jetson-stats. It gives you a much better operational view of the Jetson module, including clocks, memory, thermal state, and power mode.
sudo apt install python3-pip
sudo -H pip install -U jetson-stats
If you are in mainland China:
sudo -H pip install -U jetson-stats -i https://pypi.tuna.tsinghua.edu.cn/simpleThen reboot:
rebootAfter reboot:
jtopIf installation succeeded, you should see a terminal UI similar to this:
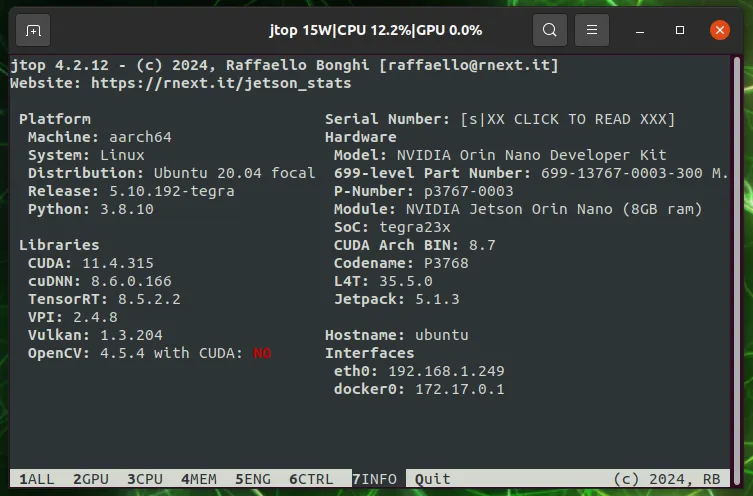
Confirm JetPack and Library Versions
The next check is more important than it looks. You want to confirm that the system version, JetPack version, CUDA, cuDNN, TensorRT, and related libraries match the environment you plan to target.
If your environment differs too much from the expected stack, you may need to reflash the device using NVIDIA SDK Manager from a supported x86 Ubuntu host.
In the original setup behind this guide, JetPack 5.1.3 was chosen deliberately because:
- JetPack 6 was still rough for some dependencies
- many third-party setup notes and prebuilt wheels still targeted JetPack 5
- TensorRT and CUDA compatibility was easier to reason about
If you do reflash, use the official SDK Manager workflow:
This may feel like infrastructure work rather than model work, but on Jetson it is one of the highest-leverage setup steps you can take.